

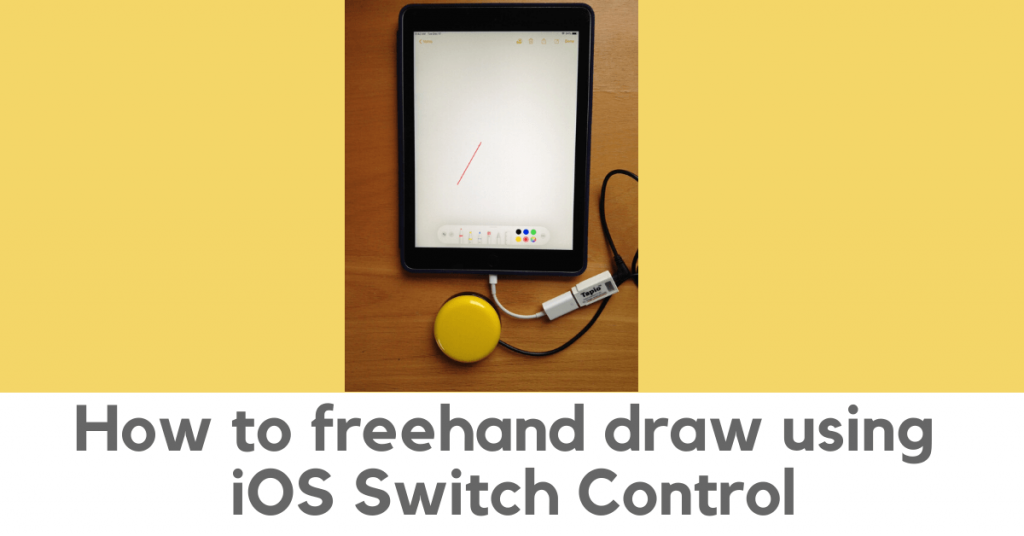
How To Use Iphone Switch Control
iOS Switch Control allows you to freehand draw using a single switch on your iPad or iPhone. Here's a step-by-step guide to get you started.
iOS Switch Control lets you control your iPad or iPhone using a single switch or multiple switches. So it can be a powerful accommodation allowing people with severe motor impairments to fully access any iOS device.
Switch Control is most often used for entering text and tapping on buttons and icons. But what about freehand drawing? There's a lot less information out there on how to do that.
This post shows you how to get started with freehand drawing using iOS Switch Control. Read on for step-by-step instructions that show you how to draw a line of any length and in any location.
Overview
This post was inspired by a question to the QIAT listserv, asking about ways to support participation in art class for a student with no functional use of hands or upper extremities. The student already uses Switch Control for other tasks like taking photos, sending messages, and writing, but it wasn't clear how to use it for drawing.
Freehand drawing means that you control everything about the drawing: the shapes and paths, as well as their sizes, positions, colors, etc. This is a tricky ask for switch access, since it means that we need to be able to select any location on the screen, and draw freely in whatever direction and shape we choose. With the Gestures options within Switch Control, we can get pretty close to this ideal.
All of the steps presented here are built-in to iOS Switch Control. We'll use one external switch, but you can also do this with two switches. The basic idea of Switch Control is that you use the switch to select an item (like a location on the screen or a button), and then you select what action you want to apply to that thing (like tap on it, or drag it). For our freehand drawing activity, we are going to rely heavily on Switch Control's Point Mode, to allow us to select any location on the screen, and the Gestures menu, which provides a set of actions that help define motion across the screen.
This video shows the process of drawing a line using Switch Control, as a basic building block for doing full freehand art activities:
Next, we'll go over the steps to get this all to work.
Some prerequisites
There are a few things to set up before we get into the detailed step-by-step instructions. Some of you may be regular Switch Control users, in which case you've done most of this already. If you're new to this stuff, please let me know if you have questions about how to do any of these steps.
Choose what switch you'll use
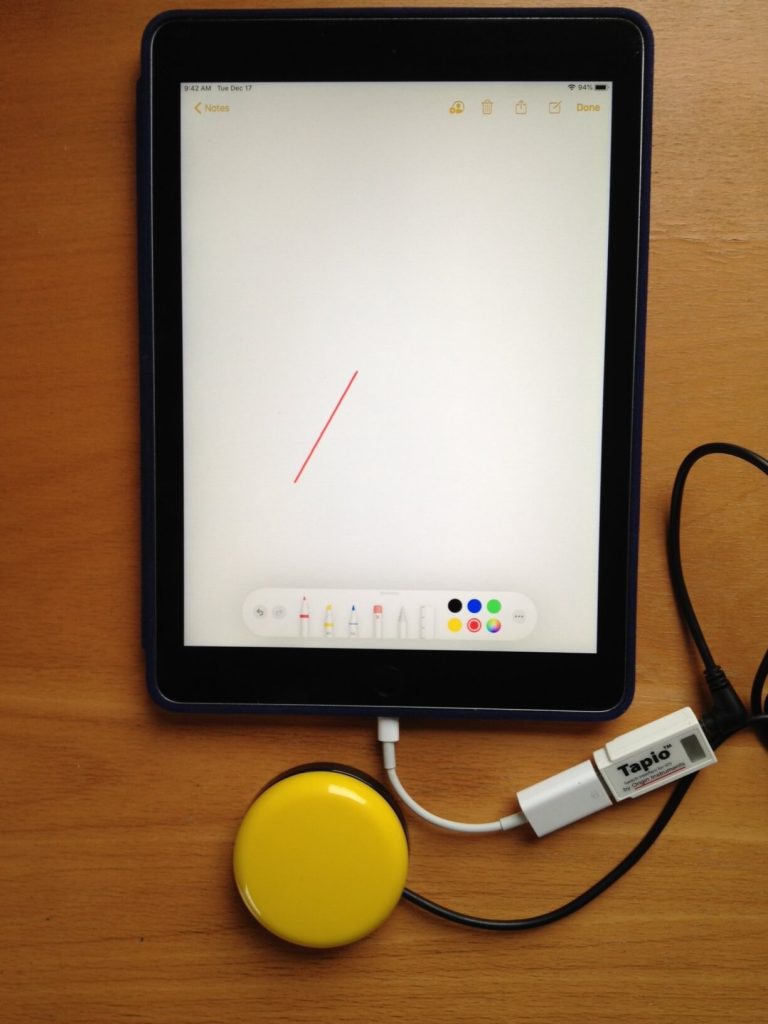
Before you start, gather a switch and a switch interface. You could use a wireless switch interface like the AbleNet Blue 2, which will pair using Bluetooth. I use a wired interface, the Origin Instruments Tapio, which uses a USB-to-Lightning adapter to connect to the iPad.
In my case, I connected my round yellow switch to the iPad using a Tapio interface and a Lightning-to-USB adapter, as shown in the photo.
If you don't have a switch available, Switch Control does have the option to use the screen as a switch. Just tap the screen, instead of pressing an external switch. To set that up, go into Settings > Accessibility > Switch Control > Switches > Full Screen. Then set the Default action to Select Item.
Set up Switch Control
Now let's set up Switch Control to use the single switch to select items.
- Set up the Accessibility Shortcut to turn Switch Control on and off (optional, but recommended). This lets you triple-click the Home button to exit Switch Control any time if you get stuck while experimenting.
- Connect your switch and switch interface and configure the switch to do the Select Item action. (Or set up a Full Screen switch as described above.)
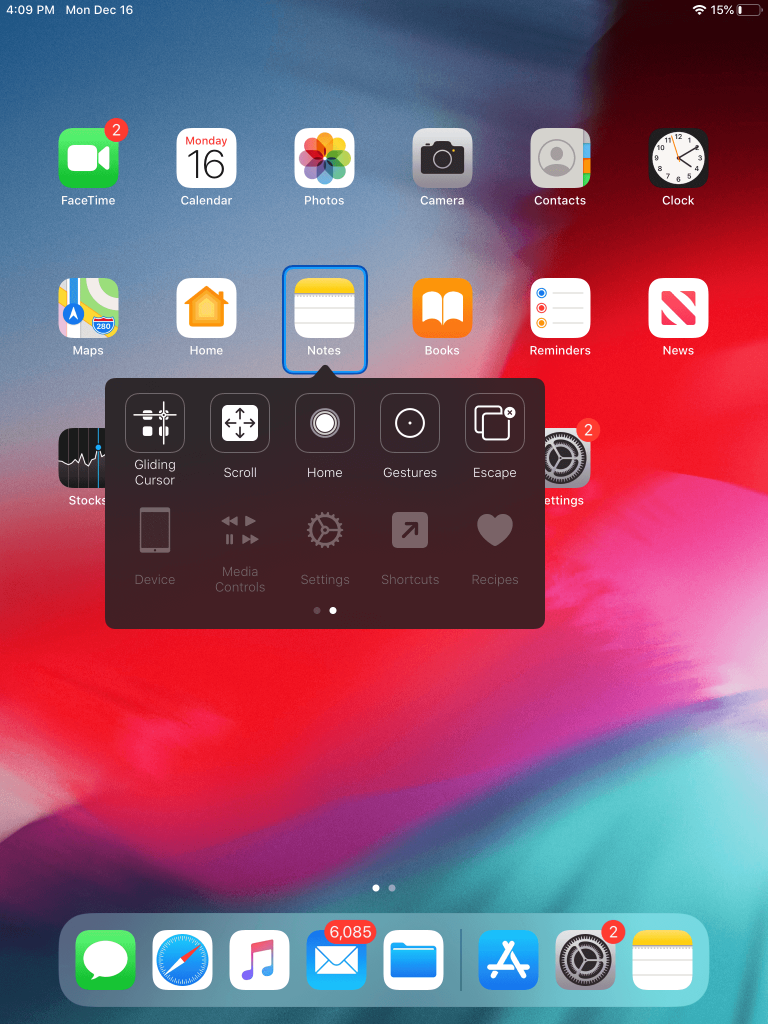
- Get familiar with Switch Control if you aren't already. Make sure you know how to open up the Scanner Menu (see image below), use point scanning, and move between Item Mode and Point Mode.
Here's an example of a Scanner Menu, giving you options to choose an action with your switch:
Your Switch Control settings should basically look like this, with Tap Behavior set to Default and Scanning Style set to Auto:

For two-switch users
This post focuses on using a single switch, using automatic scanning, but it's also possible to use two switches (or even more). For the two-switch setup, configure one switch to do the Move to Next Item action and the other switch to do the Select Item action. Change the Scanning Style to Manual. And that should do it.
Steps to draw a basic line using Switch Control
OK, now that you're able to select items using your switch, let's go through all the steps needed to draw a basic line using Switch Control.
- Turn Switch Control on, using Auto Scanning Style for single-switch scanning.
- Open up a drawing app. I used the sketch tool in Notes, but you can use any drawing app, like SketchBook.
- Choose a point for the start of the line: Use point scanning (with the moving crosshairs) to select the exact spot.

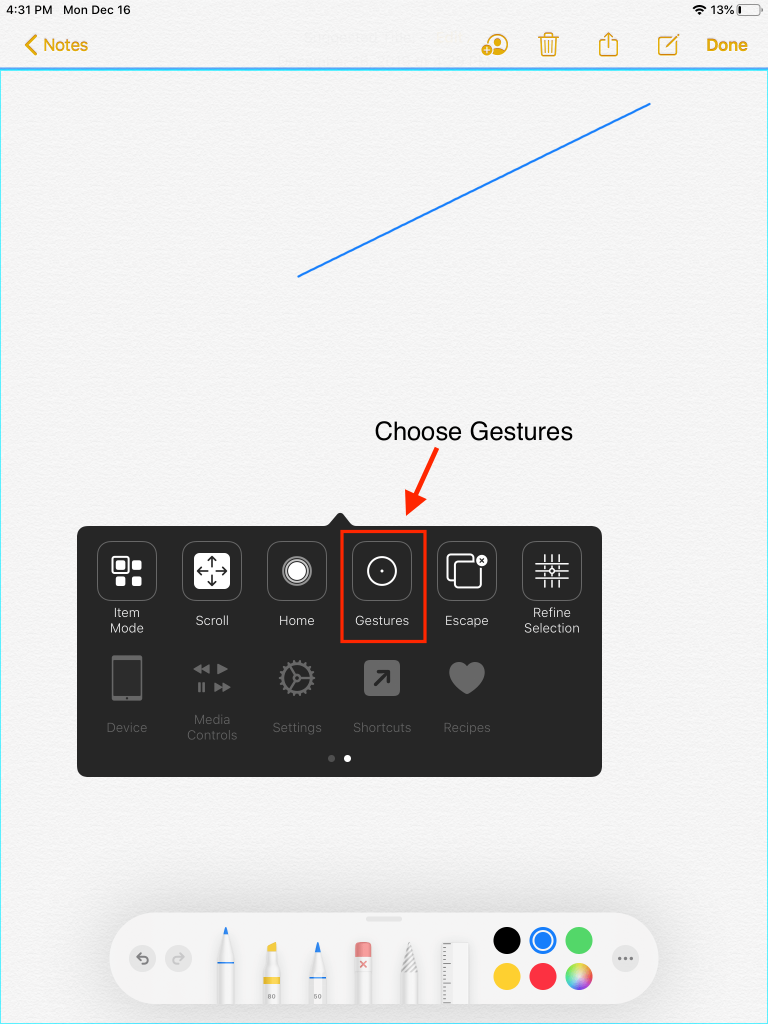
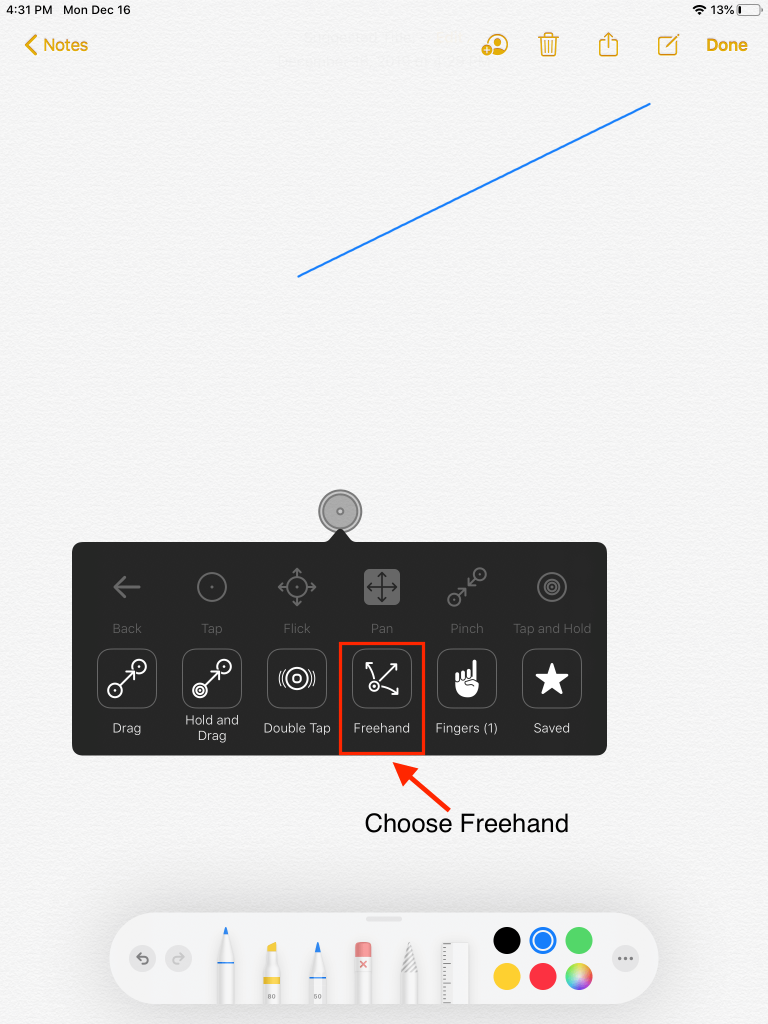
- Because we have the Tap Behavior set to Default, once you select the spot, it will then wait for you to tell it what action you want to do on that spot. We are going to select a Gesture, rather than the usual Tap. Choose the "two dots" on this first action menu to get to the next page of actions, which includes Gestures.

- Select Gestures from the scanner menu.
- Choose Freehand (second row of Gestures). Note the arrow that appears on the screen. This shows the current direction of the path, i.e., where the line will be drawn in the next step.
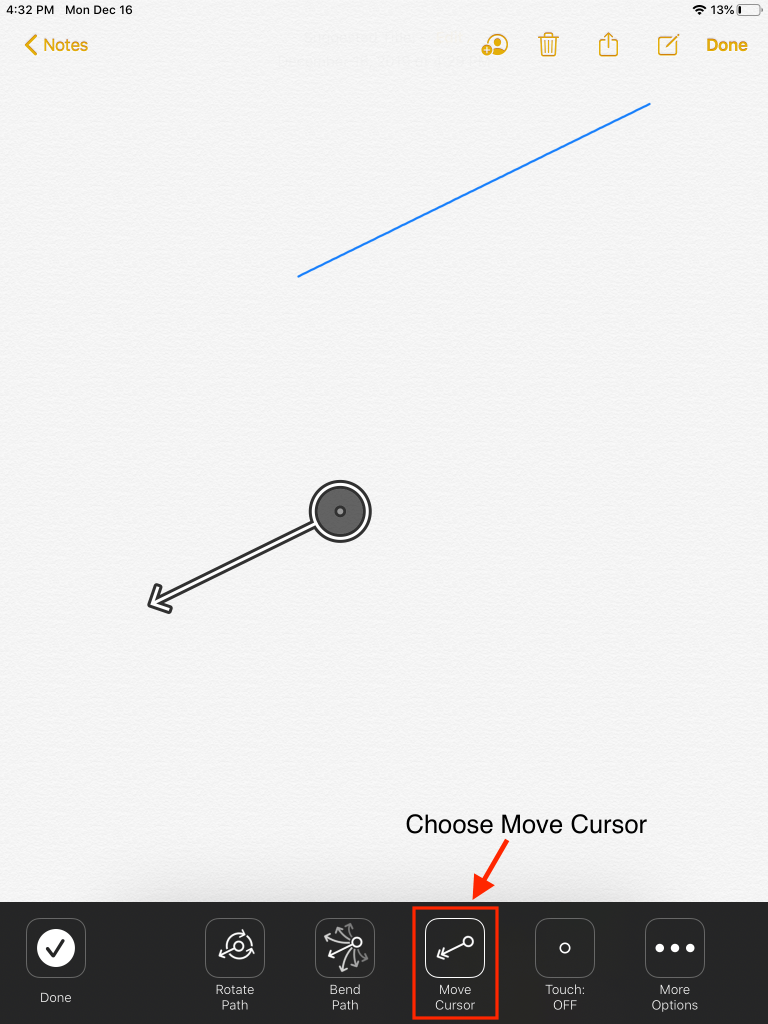
- Choose Move Cursor. This actually draws the line — it starts drawing from the location you chose in Step 3 in the direction of the arrow. Note that there are ways to change the direction and path of the line by using other items within the Freehand menu, such as Rotate Path or Bend Path.
- Choose Stop to stop drawing. This sets the endpoint of the line. You can then keep drawing from this point, if you want, say to add a curved line to the straight line you just drew.

- Choose Done to tell it you are done with this part of the drawing and ready to resume from the top.
Take another look at the video of me drawing a line if you want to see the whole process in action.
This is quite a few steps just to draw a straight line, but hopefully it will give you the idea and get you started.
Build on the basics
If you can freedraw a line, you've got the basic foundation for building up a full drawing. By combining other available Gestures, you can make shapes, curved lines, etc. Check out this video by Christopher Hills where he demonstrates how he uses Switch Control to draw freehand lettering in a Digital Touch text message.
Have you used Switch Control for freehand drawing? Let us know!
How To Use Iphone Switch Control
Source: https://kpronline.com/blog/how-to-freehand-draw-using-ios-switch-control/
Posted by: klattmort1951.blogspot.com
0 Response to "How To Use Iphone Switch Control"
Post a Comment